Finished fire escape

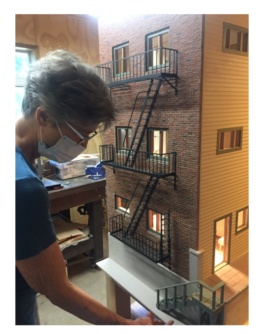
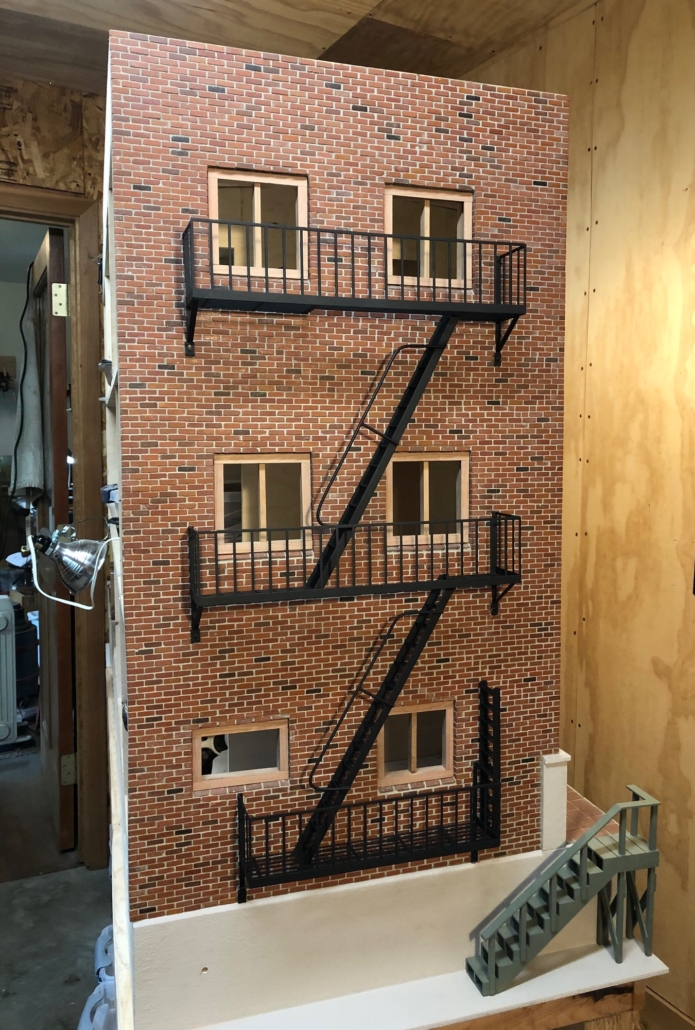
After more than a month of dealing with tiny tweezers, rulers, PVA glue, sharpened pencils, sand paper, little brass jigs made to help cut bricks in perfect halves, Q-tips etc. etc. on the façade of my city house, I debated long and hard about whether the rear wall which faces a back alley would also be brick. Long and Hard!! Would my imaginary owner/builder decide to trim costs and maybe shiplap that back wall to save money? (Stickley’s plans left many decisions up to the home owner.) I mean, who would see it except for the city garbage collector? After watching hours of “Friends” re-runs with my granddaughter, the idea of a fire escape came to mind. The decision to brick that rear wall was made. How cool would that look? Done!

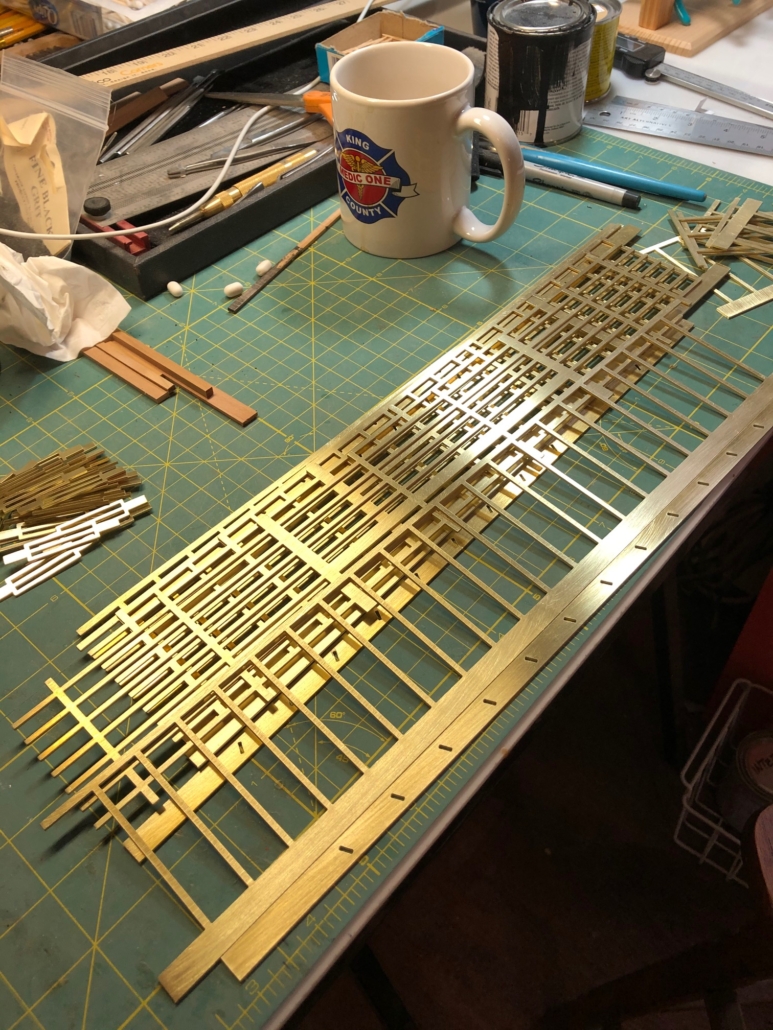
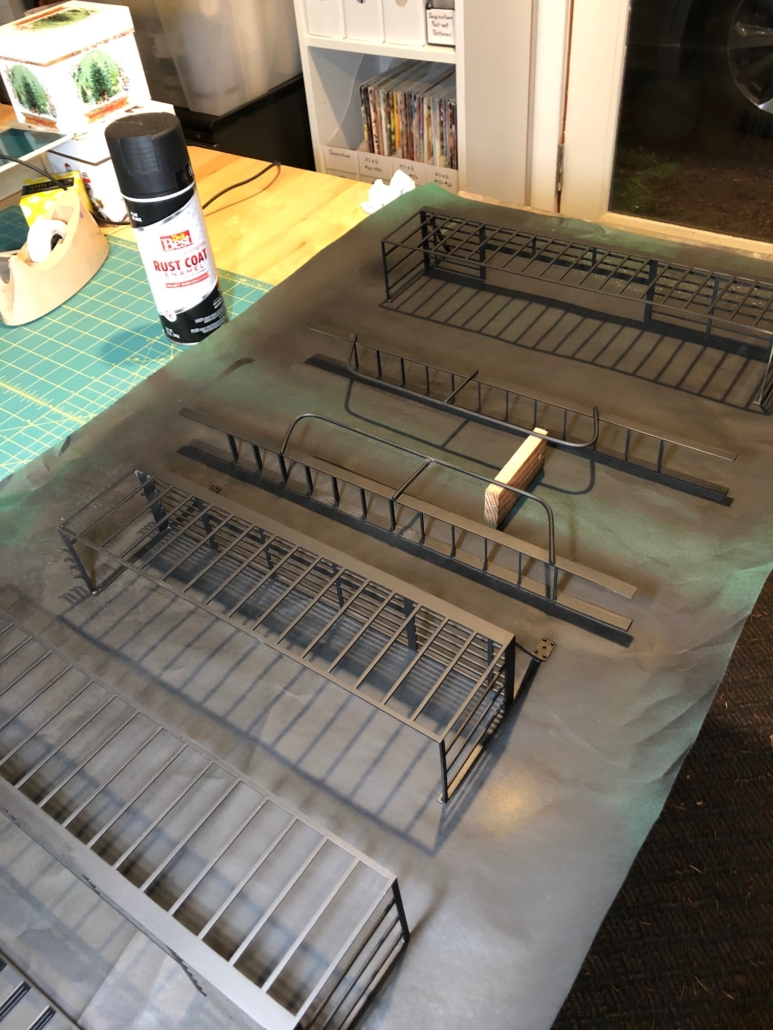
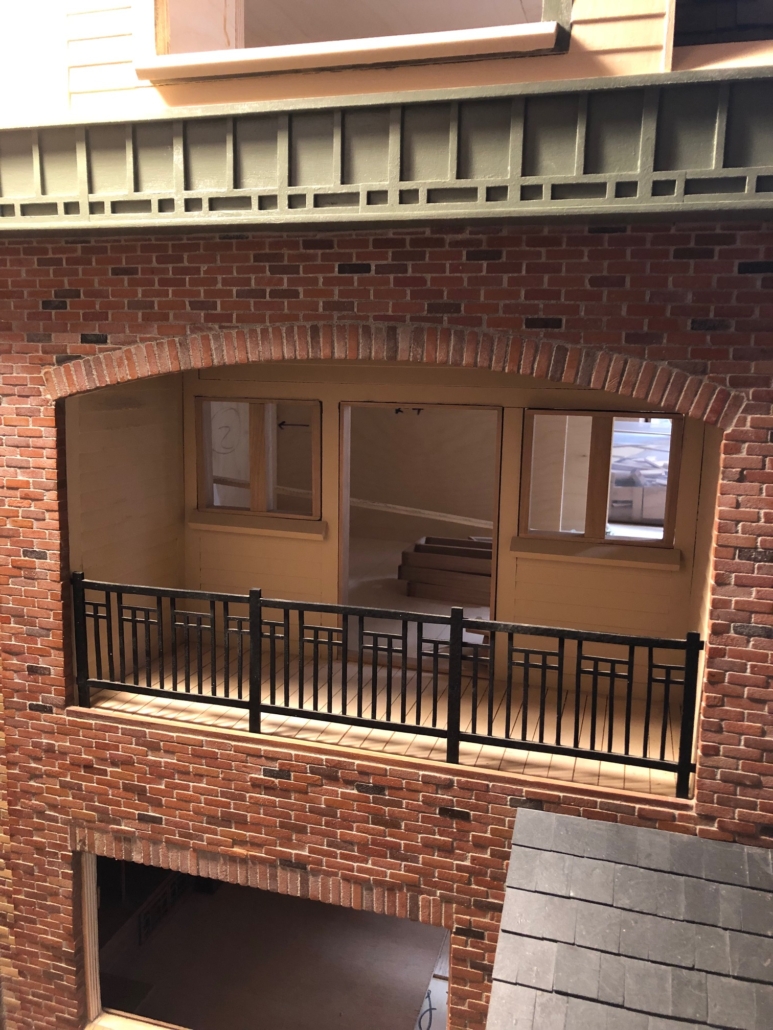
I bricked the entire wall. It was much easier and faster than the front wall that had indentations, decorative brick patterns in those recesses and curved porch elements. Tricky. With the rear wall bricked, then came the metal components. On the façade, I had hand cut the (“sleeping porch”) balcony railing by hand with my jeweler’s saw out of 14ga brass. It turned out fine but was a real physical effort. I couldn’t imagine cutting all that brass by hand for the fire escape that I had designed. Bob Powell of Vashon (Metal@MetalCreature.com) advertises in our local Beachcomber newspaper that he does “art fabrication” (and a lot of other things) with abrasive waterjet machining. I drafted the panels, Bob cut my pieces, and all I had to do was silver solder everything together. After sand blasting, painting and mounting, I’m more than happy with the results.       

Cut brass fire escape pieces
Painted brass pieces
Hand-cut front facade “sleeping porch” railing
A rare photo of me (because I take almost all the photos)!

Stickley H-Back Side Chair

Despite what must have been traumatic for 18-year-old Gustav when his father deserted his family, it rescued him from the drudgery (his opinion) of helping his father in his masonry trade. His mother moved the family close to her brother in Pennsylvania for support and introduced Gustav to his chair manufacturing business in which Gustav thrived. 

Chair in jig
Chair in jig

For my dining room table, I wanted to replicate original Stickley dining chairs since chairs had really started him on his way toward his life-long passion for furniture design. I chose the H-Back Chair. It was probably introduced around 1910, very plain, not obviously structural, and, typical of this period, lighter in design for a middle-class buyer with a smaller house. (Stickley was known for paying attention to what the market wanted and making appropriate adjustments to his line.) Also, by this time, he was juggling the sales and marketing of a mind-boggling range of products by his own expansion: furniture, accessories, textiles, metal hollowware, lighting, etc. Though his Craftsman furniture remained superior in construction and finish to that of his many competitors, by 1910 he was spreading himself way too thin, adding few new furniture designs and heading into a decline from which he wouldn’t recover.

Chair showing dowels

Stickley furniture was oak, fumed by exposing it to an ammonia solution in an airtight container resulting in four color finishes. All my furniture is cherry which I buy from Northeastern Scale Lumber Co., a great source of fine model building materials in Massachusetts. The H-Back chair is free of the structural elements like exposed tenons so common in many of Stickley’s earlier chairs. I used dowels to support the construction of mine. I also wanted to cover the seats with real black leather which I found online at Artisan Leather in the UK. Their gorgeous black lambskin is 0.6mm thick, soft as butter and easy to wrap around wood seat forms and tuck into the chair frames.

Review: I think my H-Back chairs are probably too “beefy” in proportions compared to their lighter originals…and, no (I’m sure you wondered), my chair seats of leather stretched over wooden forms must not be very soft and comfy. These are the first chairs I have ever made. Thinking of all the additional chairs of all kinds I’m going to have to make, I’m always open to room for improvement!

Complete Dining Room Set